
The trackstaroverlay module receives data about currently playing
tracks from trackstar and
displays it in as an OBS Browser Source.
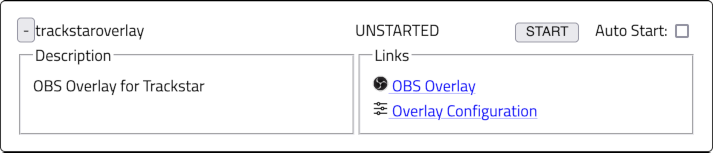
The trackstaroverlay module provides two links. The OBS Browser Source
link provides the URL to use in the OBS Browser Source configuration. When
configuring the Browser Source, you should set the Width and Height
to match OBS's video resolution. The other link goes to a page for configuring
CSS to customize the look of the overlay.
Overlay Custom CSS
You can customize the look of the overlay using Cascading Style Sheets (CSS), a standard web technology.
Those familiar with CSS should look at the index.html for the
overlay; the default style is fairly well-documented. When a new track is loaded,
the fadeOut class is set on the track to animate hiding the current
track data. After that animation is complete, the fadeIn class is
set on the track to animate bringing the new track information in.
When you hit Save below the Custom CSS entry box it should take effect
in the overlay immediately. Some CSS changes don't seem to take effect properly
without a refresh. It's helpful to use the trackstar Demo Delay to
send new tracks to the overlay for test purposes.
Next to the Save button is a color picker. You can use it to choose a color and when you close the color picker the selected color will be copied to the clipboard. You can then paste that into the Custom CSS entry box.
A CSS Primer
For those not familiar with CSS, some aspects of it are very straightforward and others are difficult to understand. Luckily, there's a lot you can do with the straightforward parts.
Overlay Structure
The overlay is technically a web page and to write CSS for it we need to understand the structure of the document.
- Track
-
- before-deck-id
- deck-id
- before-when
- when
- before-artist
- artist
- before-title
- title
- before-end
All the data is contained with a track. After that:
- before-deck-id
- An empty field before the deck ID that's not dispalyed by default
- deck-id
- An identifier for the deck the track came from. This will usually be empty and isn't displayed by default
- before-when
- An empty field before the timestamp that's not dispalyed by default
- when
- A timestamp for the track, not displayed by default
- before-artist
- An empty field before the artist that's not dispalyed by default
- artist
- The track's artist
- before-title
- An empty field before the title that's not dispalyed by default
- title
- The track's title
- before-end
- An empty field before the end of the data that's not dispalyed by default
Selectors and Blocks
Most CSS looks like this:
.track {
    font-family: "Verdana";
    text-size: 48px;
}
In the example above, .track is a selector. It identifies
what parts of our HTML document this CSS refers to. The curly braces ({})
define a block; everything between the curly braces applies to the parts
of the document that match the selector and the parts of the document inside that.
All of the above fields (e.g. artist, title) are inside
of track so any CSS that applies to the track applies to these
properties.
Properties and Values
Inside the block are properties and values. The property comes before the colon, the value comes after the colon. A semicolon signifies the end of the value.
In the example above, the property font-family specifies which font
should be used for the track and data inside of it. The value of the font-family
is the font Verdana. The property text-size specifies
how big the text should be; 48 pixels tall.
Simple Properties
As stated above, some properties are really simple to work with. Here are a few:
- background-color
- The background color. You can use the color picker below the editor.
- border-color
- Create a border around part of the overlay with this color. You'll also
need to specify
border-styleandborder-width. - border-style
-
How to draw the border around part of the overlay. The most common is
solid. You'll also need to specifyborder-colorandborder-width. - border-width
- How thick the border should be.
1pxwill make it 1 pixel thick. You'll also need to specifyborder-colorandborder-style. - color
- The color to use for the text.
- display
-
How to show part of the overlay.
nonehides that part.blockshows the part on its own line.inlineshows the part on the same line as other parts. - font-family
- The font to use for text in this part of the overlay. The name should
be put in double quotes:
"Helvetica"or"Sans Serif". Note that for security reasons, you can't use most of the fonts on your computer. - font-size
- How large the text should, such as
32px. - font-style
-
Modify the text such as making it
italic. - font-weight
- How heavy the text should be drawn, such as
bold. - height
- How tall part of the overlay should be.
- opacity
- Make part part of the overlay transparent. A value of
0makes the part fully invisible.0.5makes the part half transparent.1makes the part fully opaque. - padding
- Specify a certain thickness of empty space around part of the overlay.
A value of
5pxwill ensure there's 5 pixels of empty space all around that part of the overlay. - text-align
- Align text to the
left,right,orcenter. - text-decoration
-
Specify text decoration, such as
underline. - width
- How wide this part of the overlay should be.